Installation
Once the payment of the order you placed is confirmed, a download link for the plugin will appear in the items section on your order details page. There will also be a link to download the license key.
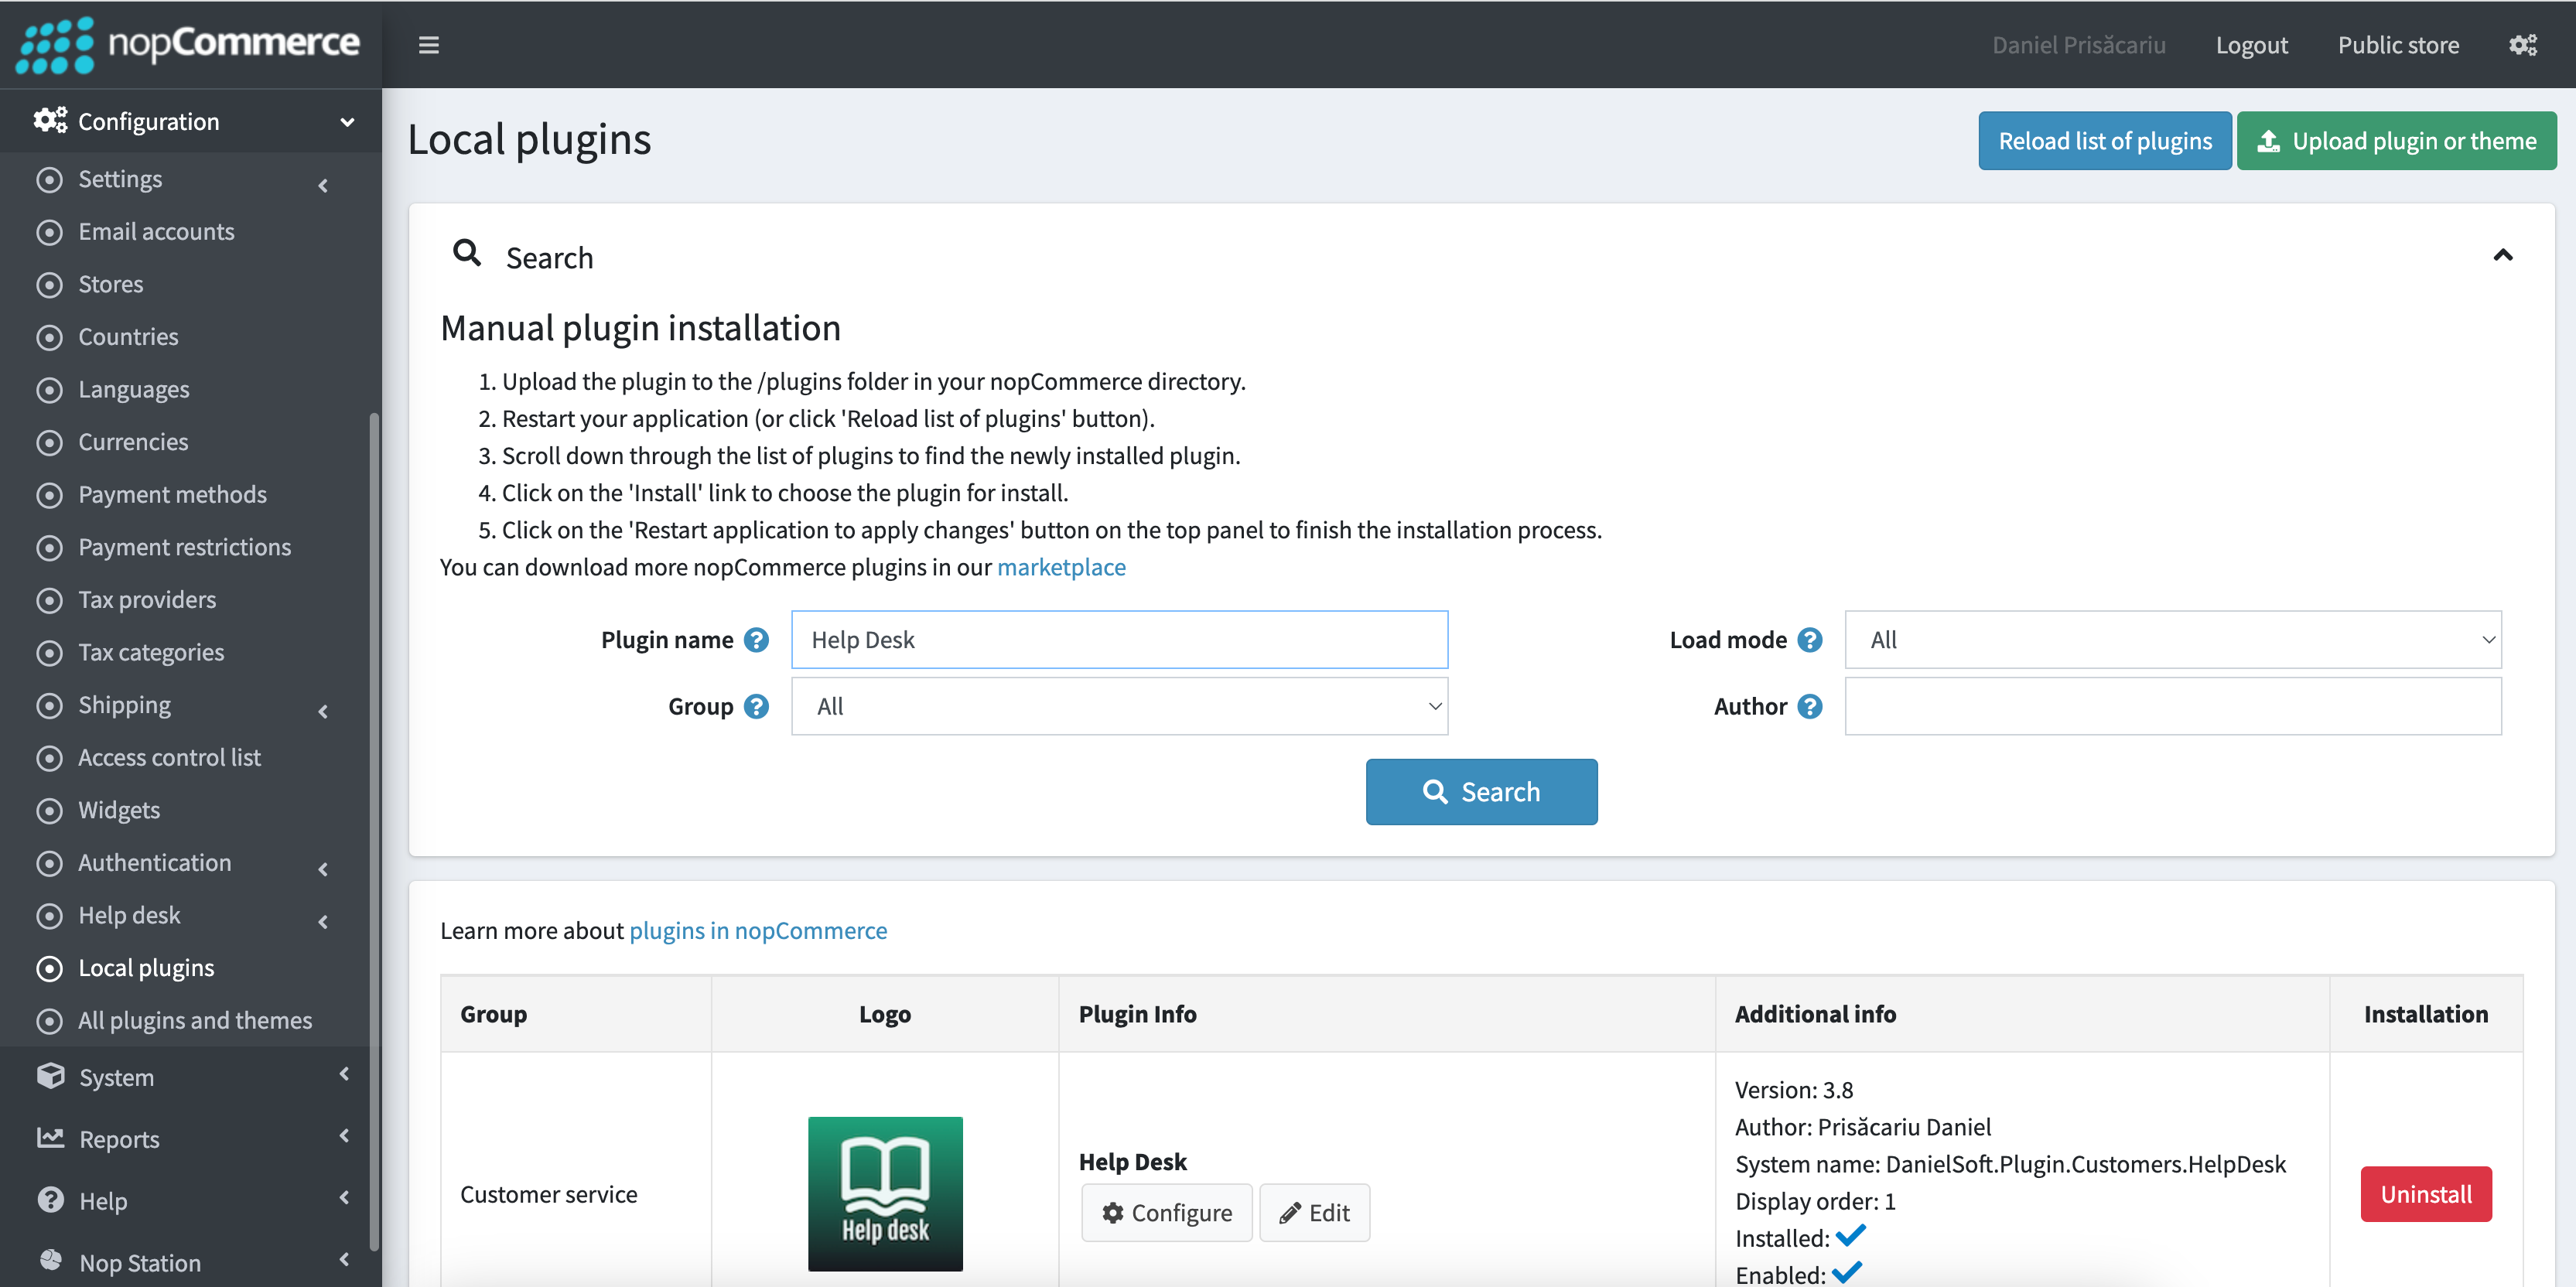
Assuming you've bought and downloaded the plugin already, you must upload the .zip archive onto your website. You can check out the nopcommerce documentation for more information about plugin installation.
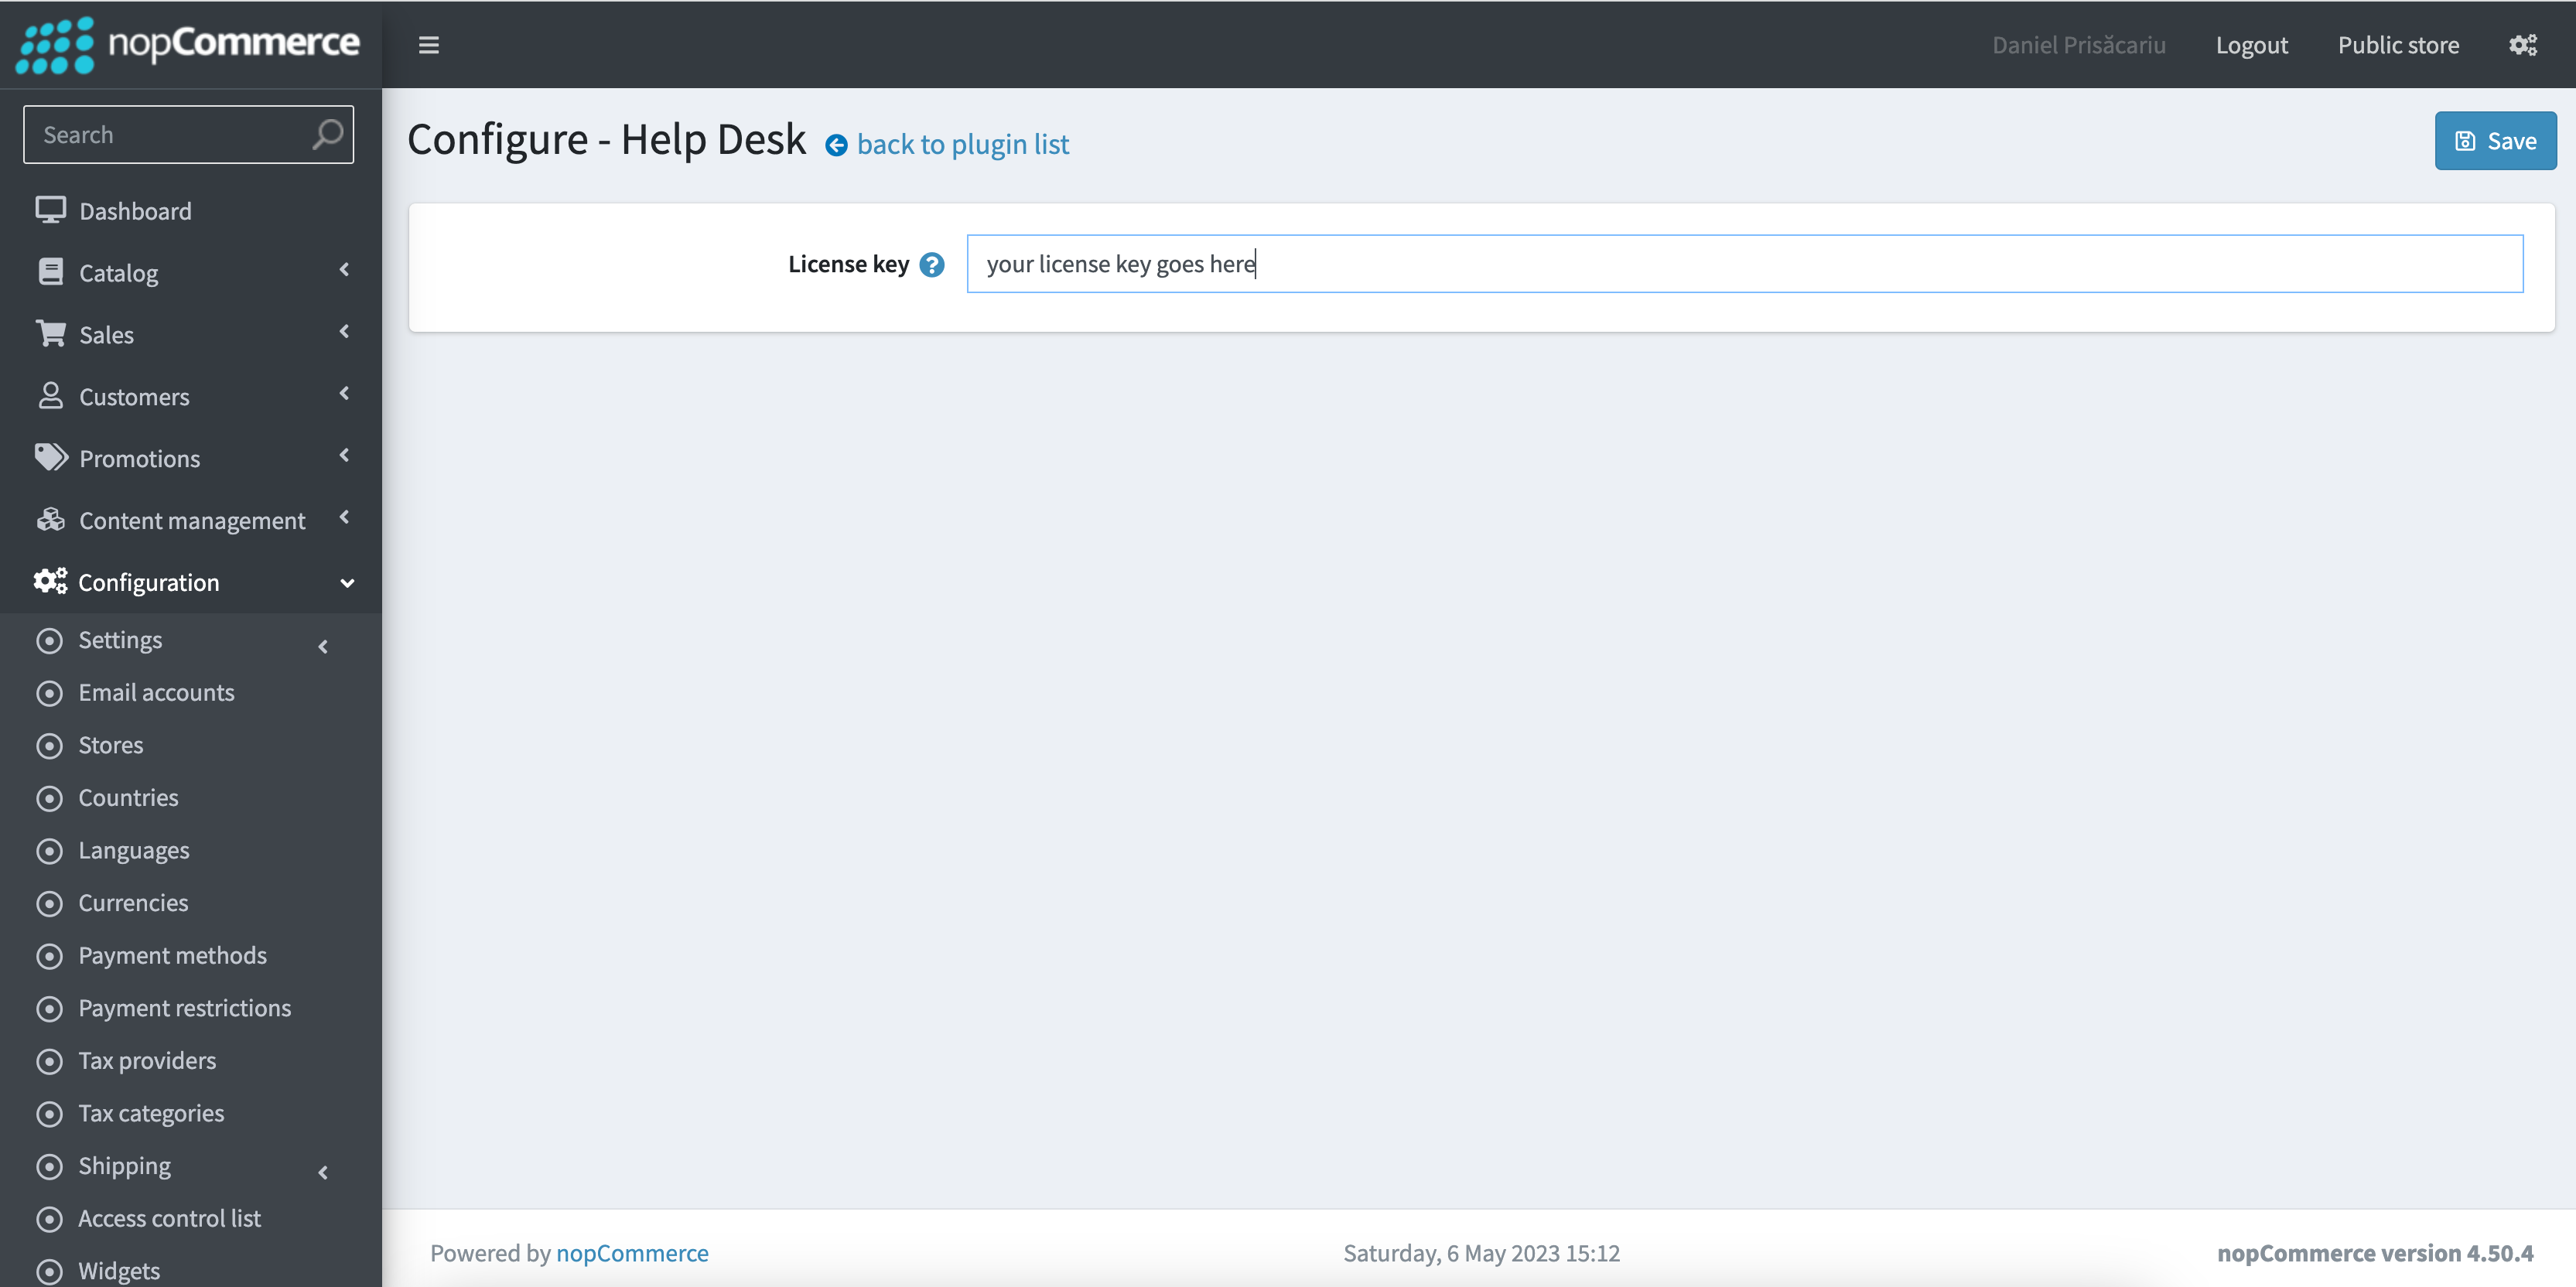
Once installed, you must activate the plugin with the provided license key. You can do this by accessing the configuration page, which can be accessed from the Configuration > Local Plugins page. Find the Help Desk plugin and click Configure. If you have any issues regarding the license key or the plugin, please submit a ticket here.
Basic configuration
Create a customer role to manage features
The plugin created no new roles; instead, it made permissions to set to a new customer role for the staff, which will manage features. You can check the nopcommerce documentation for more information about customer roles and the access control list. The permissions that can be assigned are as follows:
- Admin area. Access knowledge base
- Admin area. Manage articles
- Admin area. Manage departments
- Admin area. Manage issues
- Admin area. Manage settings
- Admin area. Manage ticket reply templates
- Admin area. Manage ticket statuses
- Admin area. Manage tickets
Help desk configuration
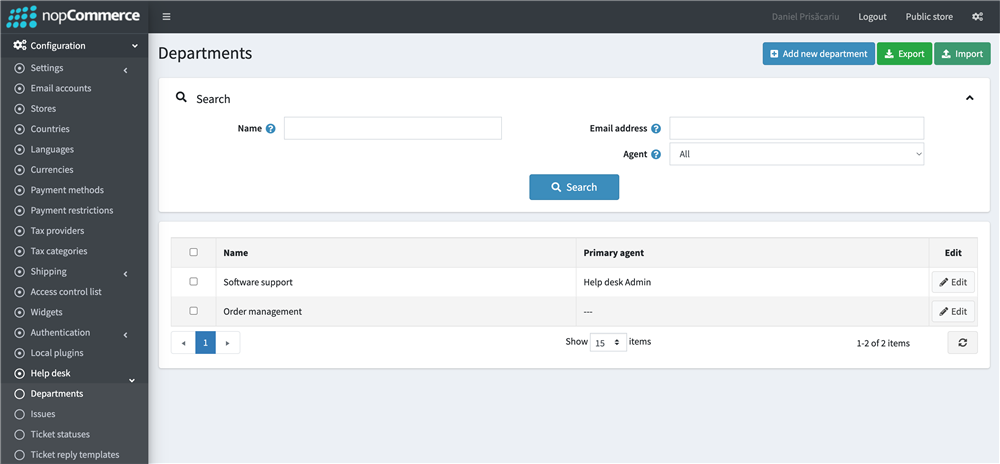
Create departments
A department comprises one or more agents and may have a separate email account for notifications.
- Go to the admin area
- Using the main menu, navigate to Configuration > Help desk > Departments
- Click on "Add new" in the top-right corner
- Set the department information and click "Save" in the top-right corner
- (Optional) From the departments' list, click the "Edit" button near the newly created department. Click the "Add new" button located in the agents' list panel to add a new customer as an agent. Note: selected customers must have appropriate permissions to manage tickets.
- Repeat for as many departments as you need
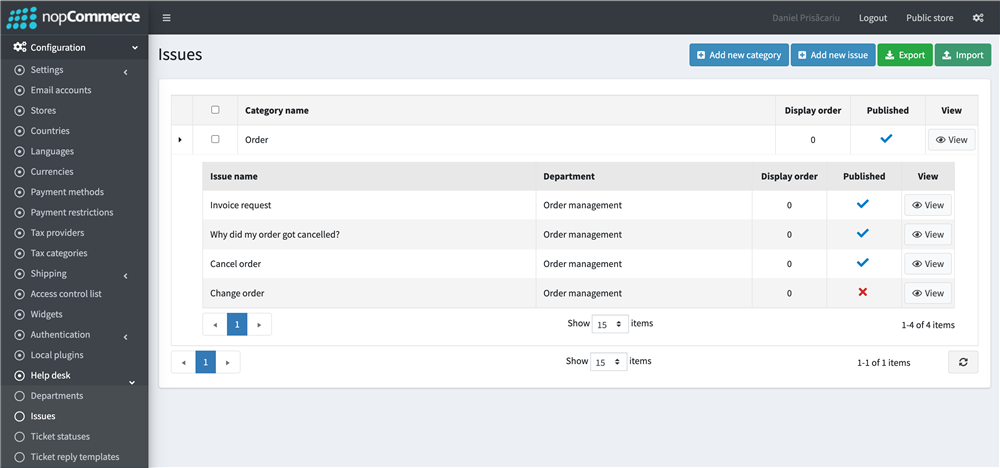
Create issues
Issues are used to determine the scope of a customer's problem. For example, you could have something like "Shipping" as an issue category and "Damaged parcel" as an issue. Suppose you set a department to an issue. In that case, all tickets created under that specific issue will be automatically assigned to that department. Either the primary agent, the email account set on the department, or the store owner will be sent an email to notify about the new ticket.
To create an issue category:
- Go to the admin area
- Using the main menu, navigate to Configuration > Help desk > Ticket statuses
- Click on "Add new issue category" in the top-right corner
- Set the issue category information and click "Save" in the top-right corner
- Repeat for as many issue categories as you need
To create an issue:
- Go to the admin area
- Using the main menu, navigate to Configuration > Help desk > Ticket statuses
- Click on "Add new issue" in the top-right corner
- Set the issue information and click "Save" in the top-right corner
- Repeat for as many issues as you need
Create ticket statuses
Statuses are a way to keep your staff (and, optionally, your customer) up to date with the situation regarding the ticket.
- Go to the admin area
- Using the main menu, navigate to Configuration > Help desk > Ticket statuses
- Click on "Add new ticket status" in the top-right corner
- Set the status information and click "Save" in the top-right corner
- Repeat for as many statuses as you need
Knowledge configuration
A Knowledgebase is a collection of articles, guides, and answers to frequently asked questions, usually organized in multiple categories.
Clear and comprehensive knowledgebase can drastically reduce the number of support tickets you receive, saving you significant time and effort in the long run.
Think about the most logical way of organizing the knowledgebase structure (categories) for your specific use case. You can always move and reorganize articles later if needed.
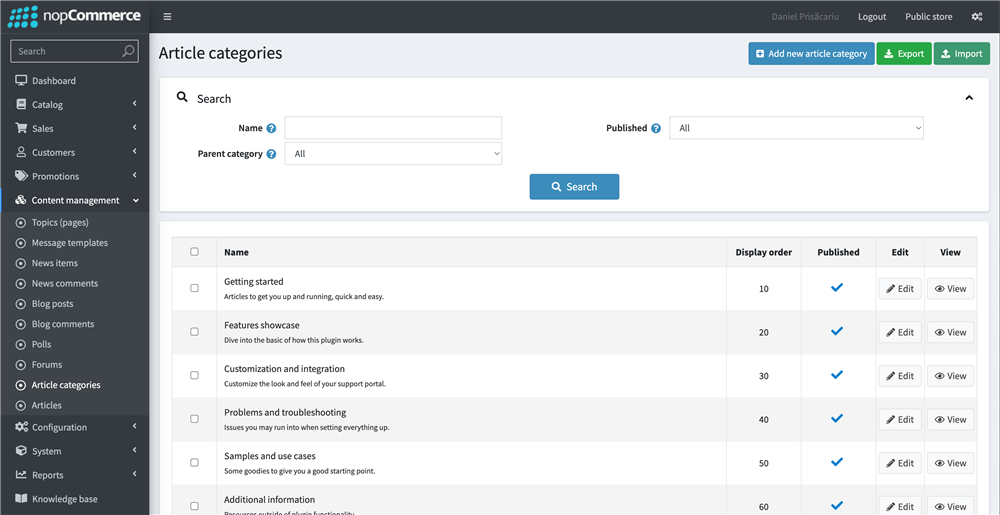
Create article categories
- Go to the admin area
- Using the main menu, navigate to Configuration > Content Management > Article categories
- Click on "Add new" in the top-right corner
- Set the article category information and click "Save" in the top-right corner
- Repeat for as many article categories as you need
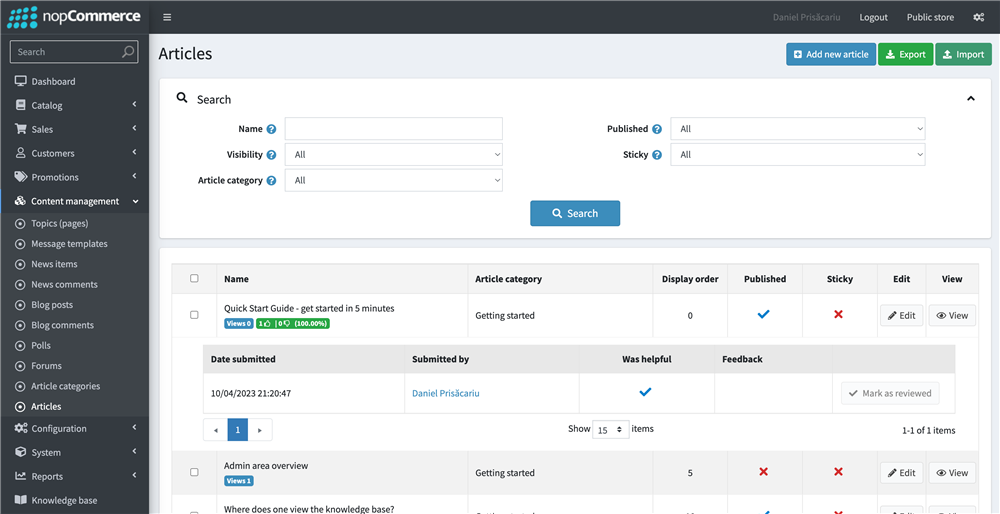
Create articles
- Go to the admin area
- Using the main menu, navigate to Configuration > Content Management > Articles
- Click on "Add new" in the top-right corner
- Set the article information and click "Save" in the top-right corner
- Repeat for as many articles as you need